This exercise consists of the following major steps:
Modern business enterprises have to contend with resources from disparate
vendors of databases for many different reasons, that includes historical: new
developments in technology; cost concerns; acquisition of resources (M &
R), etc. For example, although a large hospital might have its main database
using Oracle or SQL Server 2005, the various departments and cost centers may
use other products. In these cases, it is important to have the capability of
easily transferring objects from one vendor type product to the other. Every
database vendor provides a built-in toolset to address the migration of
database objects, or whole databases to another vendor type database.
Although this tutorial describes the details of copying a Table from Oracle 10G
XE to an SQL Server 2005 database using a SSIS task, you should review an
earlier article
(http://www.devshed.com/showblog/28087/StepByStep-Guide-to-Importing-
Data-from-Oracle-XE-to-SQL-2005/), which uses the IMPORT / EXPORT utility to
import data from Oracle 10G XE to SQL Server 2005.
In this exercise, we will transfer a Table from the hr database on the local
Oracle 10G XE server to the MyNorthwind database on the local SQL Server 2005
using a Data Flow Task. In order to follow the steps indicated, you will need a
source and a destination—the source, data extracted from an Oracle 10G XE
server and the destination, loading this to MyNorthwind database on the SQL
Server 2005. You also need to establish a path connecting them.
Transferring a View from Oracle 10G XE to an SQL Server 2005 Database
The following are the major steps in this exercise:
-
Installing and viewing objects on the Oracle 10G XE.
-
Creating a BI project and adding a Data Flow Task.
-
Adding an OLE DB Source and confi guring it to connect to a local Oracle 10G XE
Server.
-
Confi guring the OLE DB Source.
-
Adding an SQL Server Destination and confi guring its connection manager.
-
Establishing a path from the OLE DB Source to the SQL Server Destination.
-
Configuring the SQL Server Destination Component.
-
Building and executing the package.
Oracle 10G XE Server
The Oracle 10G XE is available as a free download from Oracle's website (http://
www.oracle.com/technology/software/products/database/xe/index.html).
Downloading and installing Oracle 10G XE is fully described in the tutorial
(http:// www.devshed.com/c/a/Oracle/Experience-the-Possibilities-with-Oracle-
10g-Express-Edition).
Starting and Stopping the Oracle 10G XE Server
With the Oracle 10G XE installed, you should be able to confi gure its stop /
start mode using the Window's Services. From Start you can get to the Services
folder after clicking Control Panel, Administrative Tools, and Services in
succession. This opens the Services window as shown in the next screenshot
where you can scroll down to the Oracle XE Server. Here, you can click on the
hyperlinks in the left to stop, restart or pause the service.

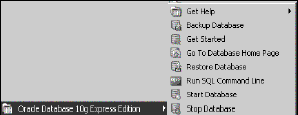
Another convenient way is to use the shortcuts installed when the Oracle 10G XE
is installed, as shown in the next screenshot. Some times the short-cuts could
get displaced and it is a better practice to look up in the Services folder.
The shortcut also gives you access to the home page of the database.
Using the Object Browser
Go To Database Home Page shortcut takes you to the Oracle 10G XE database. Using
this HTML page, you will be able to administer, as well as use, its various
tools discussed in the link provided at the beginning of this section. Yo u can
fi nd links to a number of tutorials all dealing with this database at the
author's blog
(http://hodentek.blogspot.com/2006/11/links-to-my-oracle-10g-xearticles. html).
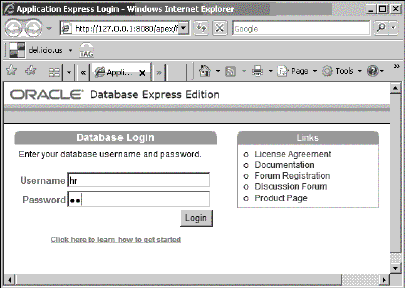
When the browser opens up, as shown in the next screenshot, you need to provide
the username and password, which are hr and hr.
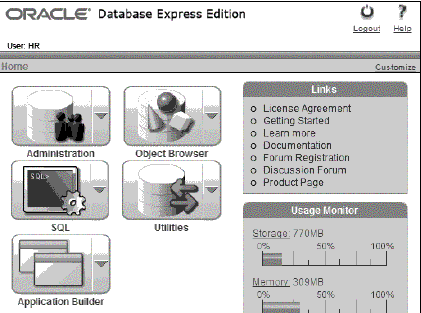
Whe n you click on the button Login, you will open the Home page as shown in the
next screenshot. You may click on the Object Browser component in the Home
page.
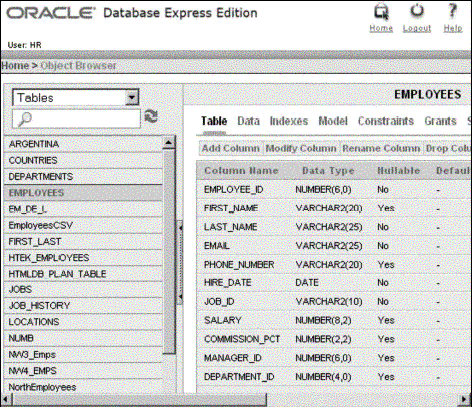
The Object Browser is the user interface to do everything with the database
objects. Here, you can review tables, views, stored procedures, etc. In the
drop-down menu with the Tables chosen, you will be able to see the details of
the Table, EMPLOYEES, as shown in the next screenshot.
Step 1: Creating a BI Project and Adding a Data Flow Task
This process has been described a number of times in the previous chapters.
-
Create a BI project Ch13. Change the name of the default package name to
OraTo2k5.dtsx. Drag and drop a Data Flow Task from the Control Flow Items group
in the Toolbox to the Control Flow page on the Canvas.
An instance of the Data Flow Task will be added to the Canvas to the Control
Flow page.
Step 2: Adding an OLE DB Source and Configuring it to Connect to a
Local Oracle 10G XE Server
-
Drag and drop a OLE DB Source from the Data Flow Sources group in the Toolbox
to the Data Flow page of the Canvas.
-
Right-click an empty area in the Connection Managers' page in the Canvas, and
from the pop-up menu choose New OLE DB Connection…
(The detailing of what to do next is abbreviated as this has been dealt in an
earlier chapter). This opens the Confi gure OLE DB Connection Manager's window.
The left-hand area shows all existing data connections under Data Connections:
label and the right-hand area shows the details of the data connection you
choose on the left under the label Data connection properties. On the right
side, below you will fi nd the New… button to create a new OLE DB Connection.
-
Click on the New… button.
This opens the Connection Manager's window that opens as a default connection
to the SQL Server 2005 using the SQL Native Client provider, and as such this
window has controls suitable to connect to an SQL Server. However, to connect
to an Oracle database we need to use a Provider for Oracle, which is chosen
using the drop-down menu item corresponding to the Provider label on this page.
-
Click on the drop-down menu and choose the Microsoft OLE DB Provider for
Oracle, as shown in the next screenshot.
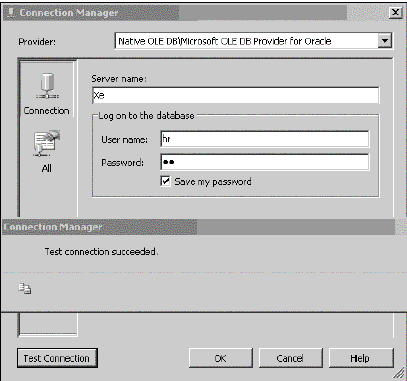
The next fi gure shows the Connection Manager's page as well as the result of
clicking the Test Connection button in the mini-step 5 to follow.
-
Enter Xe for the Server name, hr for username, and hr for password. Also place
a check mark for the Save my password check box.. Click on the Test Connection
button.
As the information supplied is correct, the connection to the Oracle 10G XE was
successful.
-
Click on the OK button on the Test Connection button generated message as well
as the Connection Manager window.
This will bring you back to the Confi gure OLE DB Connection Manager's window.
A new OLE DB Connection xe.hr gets added to the Data Connections area in the
left.
-
Click on the OK button on this window.
This completes the connection manager setup for the Oracle 10G XE. A connection
manager xe.hr appears in the Connection Managers' page on the Canvas.
Step 3: Configuring the OLE DB Source
-
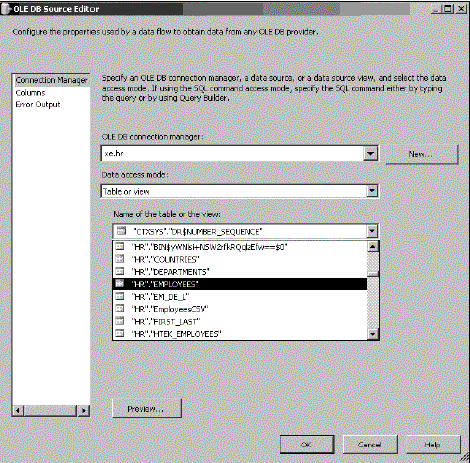
Right- click the OLE DB Source component on the canvas and bring up the OLE DB
Source Editor, as shown in the next screenshot.
The OLE DB Connection Manager is the recently created connection manager xe.hr.
As we are accessing a Table from the database, the default for the Data access
mode: is acceptable as it is.
-
Click on the drop-down for the Name of the table or view:
This fi eld reveals all the accessible objects on the hr database on the Oracle
10G XE Server.
-
Choose the view, "HR"."EMPLOYEES", we saw earlier in the object browser of this
database.
-
Click on the Preview… button to see the Table that is being used from the
Oracle 10G XE through this connection.
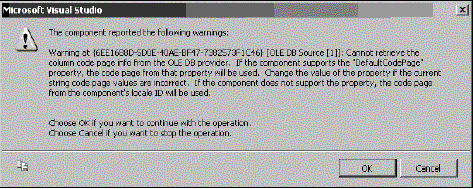
This brings up a Microsoft Visual Studio warning page as shown in the following
screenshot. Ignoring this warning and continuing by clicking on the OK button
on the window with the warning will show all the columns of the EMPLOYEES in
the Preview Query Results window.
-
Click the OK button.
Step 4: Adding a SQL Server Destination and Configuring its
Connection Manager
-
Drag and drop an SQL Server Destination component from the Data Flow
Destinations group, from the Toolbox onto the Data Flow page of the Canvas.
-
Following a procedure similar to the OLE DB Connection Manager, confi gure a
Connection Manager (LocalHost.MyNorthwind) for the SQL Server Destination.
The following screenshot shows the fi nal screen of the Connection Manager
window, after the connectivity test using the Test Connection button. The
Provider chosen is the Microsoft OLE DB Provider for SQL Server. You may notice
that the (.) format is used for designating a default SQL Server 2005
installation. This server uses SQL Server Authentication. After choosing the
authentication, you will be able to Select or enter database name from a
drop-down list. In case your server uses Windows authentication, you don't need
to provide the username and password.
Step 5: Establishing a Path from the OLE DB Source to the SQL Server
Destination
This has been described in most of the tutorials , so wont be repeated here.
-
Establish a path from the OLE DB Source to the SQL Server Destination.
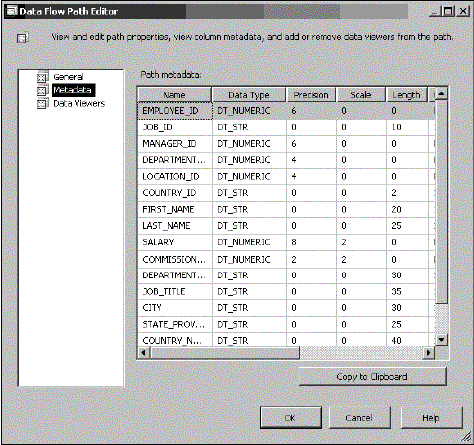
The Metadata of the path connecting the source and the destination will appear
as shown in the Data Flow Path Editor window below.
Step 6: Configuring the SQL Server Destination Component
-
Right-clic k the Sql Server Destination component and from the drop-down click
on Edit….
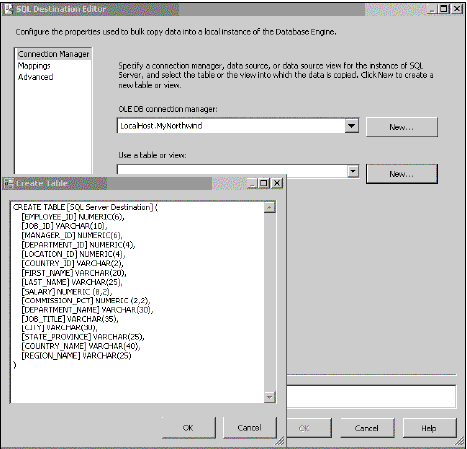
This opens up the SQL Destination Editor displaying the connection manager
confi gured earlier.
-
Click on the New… button. "Use a table or view:".
This pops-up the Create Table window shown superposed on the SQL Destination
Editor.
-
In the Created Table window, replace the SQL Server Destination by some name of
your own. Here, for this exercise, it is called Oracle Table. Click on the OK
button on the CreateTable window after changing SQL Server Destination to
OracleTable.
-
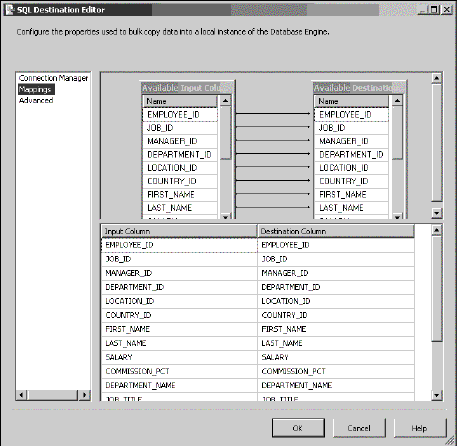
Now th at the connection manager and the table are chosen, click on the
Mappings list item on the left. This opens the Mappings between the View on the
Oracle 10G XE and the Available Destination Columns.
Accept this default mapping and click on the button OK on the above editor to
complete the SQL Server Destination confi guration.
Step 7: Building and Executing the Package
-
Build and ex ecute the package.
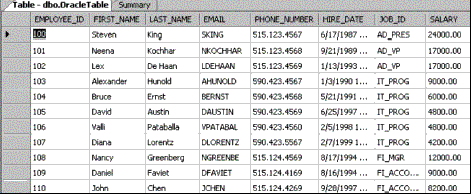
The program runs and after a while the source and destination components turn
green indicating that it was a successful run. Open the OracleTable table in
the SQL Server to verify that data has been transferred as shown below.
Summary
In this chapter the steps involved in transferring the data in a Table in the
Oracle 10G XE server to a table in the SQL Server 2005 , were described.
Installing and reviewing the objects in the Oracle 10G XE's hr database was
also looked at.
|